Navigating Hidden Tabs On A Layout Via Drop-Down Menu (with demo file)
FileMaker 8 gave us tab controls. Tabs can replace a set of layouts to save you time as a developer (eg. fewer layouts to maintain) and give your user a more streamlined solution. If you already use tabs, you may have layouts that look like the one below with lots of tabs or with multiple set s of tabs. That can get quite cumbersome to navigate or to even look at.

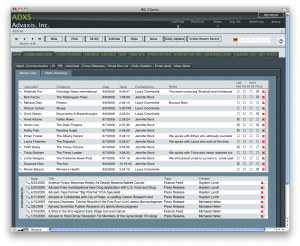
I designed the layout on the left over 4 years ago with the skill set I possessed and the capabilities FileMaker had at the time. You can clearly see we had a lot of tabs and several of them even have enclosing tabs.
If you are interested in designing your layout to look similar to this one without tabs (FOCUS Framework showed here courtesy of Vince Menanno) read on. This layout includes tabs, they are just not visible in browse mode or even to the untrained eye in layout mode.

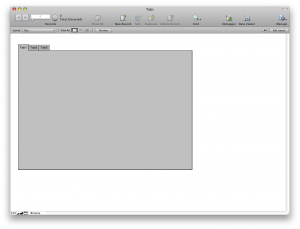
When you add tabs to a layout, your layout looks like the one on the left. This—in its original form—is not a pretty sight. You can change the color for each tab but as time goes by you will have more and more tabs, and at some point you’ll run out of real estate. This post is about removing the clutter and navigating hidden tab controls via a drop-down menu.
There is a free demo file in this post (scroll down).. To demonstrate the technique, it has a “Dogs” layout that has a tab control with 3 tabs. The second tab encloses a tab control with 2 tabs. ALL of these tabs are hidden from the untrained eye. Navigation is achieved via a drop-down menu. The menu is populated by a value list that is generated by records in a navigation table. Implementing this technique in your own file requires that you copy a table from the demo file into your own solution. You can freely implement this technique, but please note the file is “as is”. In the future we might release updates to it. Don’t be afraid to play with the file, you can always download another copy.
About hidden tabs
A tab control is “invisible” ei. hidden, when all three conditions are met:
- Tab width is “Fixed Width of 0”;
- Tab has no line attributes;
- Tab has no fill attributes.
If you don’t know whether a layout has hidden tab controls you will want to treat your layout gently. The easiest way to make hidden tabs visible is by dragging your mouse diagonally on the layout holding the Command (Apple) or CTRL (Windows) key down. Once selected, you can go to Format/Tab Control to see the formatting box.
The idea
In the demo file the invisible tabs are controlled by a value list-driven menu on the layout. There are several steps involved (see below). In the solution we added tabs to the tab controls on the layout, then assigned them “object names”. The process is that once you come back to browse mode, your tabs are automatically added to the drop-down menu, sorted by order and enclosed tabs show up on the menu under their respective parent. This demo file is not for everyone. If you are not comfortable adding an extra table to your existing solution, this is not for you.
Watch it in action
Unfortunately, YouTube cut off the end of the video with the contact information, but if you are reading this post, you know how to contact me.
Follow the steps below to implement this in your own solution:
- Copy the “Navigation” table and paste it in you solution.
- Copy the “Menu” and “Layout_Number” fields form the “Dog” table and paste it in the table your layout gets its data from. Connect your table to the “Navigation” TO (Layout_Number = Layout_Number).
- Copy and paste the whole folder of scripts called “Copy This Folder To Your Solution” into your solution. Connect your table to “Navigation” (Layout_Number = Layout_Number).
- Create a value list. Use values from a field called Navigation::Tab and also from Navigation::Sort_by. Include only related values from your own table and sort by the second field.
- Place the “Menu” field on the layout you are working on. Assign the freshly created value list to your “menu” field. Assign the “Switch to Tab ( tab ; -table ; -default_tab) “script to the OnObjectSave trigger, pass the “menu” field as a parameter.
- Create your tabs (if you don’t have them). and give each tab a unique object name.
- Go to Layout Setup/Script Triggers and assign the “Create Tab Records” script to the “OnModeEnter” trigger (only for Browse Mode) and the “Switch to Tab ( tab ; -table ; -default_tab)”script to OnLayoutEnter and set all three parameters.
- Go to Browse Mode, your menu should work now.

