FileMaker Image Management – Container Field Behavior and Much More

One of my clients called this week and told me his logo got inverted when printing to a PDF. Also, the PDF file size doubled. Previously it did not occur to me to check the file he received from his designer, because I wrongfully assumed the designer gave him the appropriate file. But this brings up some interesting points about what files we should use with FileMaker and how we should use them. So, I gathered some useful information. Hope this helps you with handing your images in FileMaker and FileMaker Go.

General Image Handling

There are several different ways you can show images on a FileMaker layout:

  • Container field (Insert/Picture)
  • Place image on the layout (copy and paste from another source)
  • Show from another source in a webviewer (i.e. using SuperContainer or DocuBin)

1. Container Field

Advantages:

  1. Quick and easy. You insert an image, and voila it’s right there. If you store the file as a reference only  (suggested use if you have constant access to the hard drive the files reside on and do not plan to move or delete them) you will not bloat your database;
  2. Anyone can export it from there by right-clicking on the image and choosing “Export Field Contents”;
  3. The image can be swapped out just by inserting another image;
  4. Scan directly into a container field (by using a plug-in);
  5. You can export or email the image (file) as an attachment;
  6. Images can be cropped or resized (pay attention to maintaining proportion).

Disadvantages:

  1. You cannot do too much manipulation without a plug-in;
  2. Your database file size gets large by every image you inserted (unless stored as a reference only), therefore eventually your database will get slower;
  3. Global container fields save on close, so your file must be accessed locally, if you’d like to save a change;
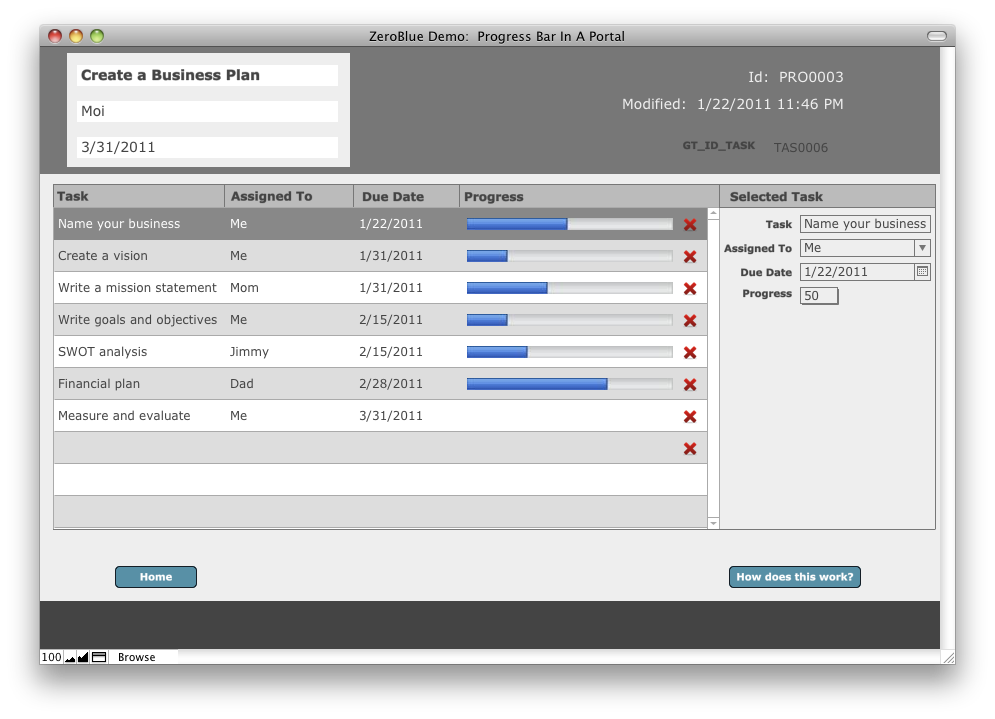
  4. You can’t find or sort records, so you need to set up a calc field. See Exhibit A;
  5. You can only print the image as it is on the layout.

2. Place Image on Layout: Placing an image on the layout is not generally a good idea, unless it is your logo or  layout design (i.e. you are creating a header), but even so it’s best to use a global container field in an interface table or an image table where you load the images from when your database starts. Although, I have to mention that I see image quality differences between a referenced image in a field vs. an image pasted on the layout: in my opinion, image quality of the pasted image will be superior.

3 . Web Viewer

  • Web viewers are great for images. You can show images from a website or SuperContainer. PDF (and certain image*) files can be viewed from a web viewer. PDFs can even be manipulated (zoom, next page, etc.) on Macs. Files are not stored in the FileMaker database.
  • You cannot print from the web viewer.  You can print the layout, but that’s agains, any decent designer’s instincts.
  • There’s a great article by Geoff Coffey on Scaling Images in a Web Viewer.

Instant Web Publishing

  • Container field data cannot be entered or modified from IWP.
  • Complex or layered pictures are not rendered properly.
  • SuperContainer works with IWP.

Image Management Helpers (Plug-Ins and Tools)

  • SuperContainer (File and image management. The images are NOT stored in the FileMaker database, rather stored on a file server (can be your local computer). Has the ability to upload/download, version files.
  • CNS Image (An all-round plug-in for image handling.)
  • InsideScan (Scan directly into a container field.)
  • ExifPlugIn (Get EXIF data from pictures taken with a camera.)
  • ScriptMaster (Has basic functions for cropping, rotating, watermarking, etc.)
  • Theme Library (Themes, buttons, image manipulation)

Supported Formats for Container Fields

FileMaker Pro supports the following picture, QuickTime, and sound formats (Exhibit B)

FileMaker Supported Image Formats

General Image Suggestions

Print Quality: 300 DPI CMYK or Grayscale JPG or TIFF (if you need large, good-quality photos)

Screen Quality: 75 DPI RGB or B&W

Transparency: If you plan to use transparency, FileMaker suggests using TIFF, PNG, or JPG images. FileMaker does not recommend using the PICT (.pct) format with transparency.)

Caveats: For proper image handling, QuickTime installation is suggested on Windows.

Image Resizing and Cropping

The Preview app on Mac OS X can manipulate images: you can crop, resize, even convert them to a different format (JPG, GIF, PNG, TIFF, etc.) (Exhibit C).  Some plug-ins and the Theme Library can enhance your image manipulation experience.

Image Resizing in Preview

FileMaker Go

FileMaker Go has now the following functions for container fields (Exhibit D):

  • Choose From Library
  • Take Photo  (iOS device with camera required)
  • Get Signature
  • Paste
  • Open
  • Email

Container Field Options on FileMaker Go

SuperContainer works with FileMaker Go without programming changes. Because SuperContainer thumbnail file sizes are a tiny fraction of the full-size images, they load much faster, especially over a 3G connection.

* You can view any image that your browser (Safari on Mac and Internet Explorer on Windows) supports.


What QR Codes (2D Barcodes) Are – And Their Uses For Your Business

Have you seen one of these square garbled-looking images before? You may have seen them on a subway poster or at an airline boarding pass or on mailers. This article will give you a little background on what they are and how they can be useful to you and your company.

What is a QR Code?

QR code (abbreviation for Quick Response code) is a specific matrix barcode (or two-dimensional code) that is readable by dedicated QR barcode readers and camera telephones. The code consists of black modules arranged in a square pattern on a white background. The information encoded may be text, URL, or other data. [Wikipedia]

According to Wikipedia,

the technology has seen frequent use in Japan, The Netherlands and South Korea, while the West has been slower in the adoption of QR codes.

I got a box of KitKat last summer from Japan (thanks, Shin) that had a QR code on it. It’s slowly but surely picking up on the East Coast, as well. E.g. BJs and other companies are using them on their savings cards.

Barcodes vs. QR-Codes

Barcode

Picture of a Traditional Barcode

QR-Codes have become more popular than the typical barcode as the typical barcode can only hold about of 20 digits, whereas the QR-Code can hold up to 7,089 characters. This makes the use and diversity of QR-Codes much more appealing than their older counter part, the barcode.

Partially part of the reason QR-Codes can hold more data, is because if you compare a typical barcode to a QR-Code, you can see one major difference; barcodes only span horizontally whereas QR-Codes can span both horizontally and vertically.

Position

A great feature of QR-Codes is that you do not need to scan them from one particular angle. QR-Codes are capable of omnidirectional (360 degree’s) high-speed reading. QR-Codes scanners are capable of determining the correct way to decode the content within the QR-Code due to the three specific squares that are positioned in the corners of the symbol.

QR-Code scanner uses three corners as markers, regardless of pistion scanned

Generating QR Codes

There are a number of web sites for generating QR codes and most services they offer for free. You can also generate QR Codes with Google Charts or right in a FileMaker database, which we will demo at Devcon. The demo database uses the ScriptMaster plug-in from 360 Works and some java goodies put to use by Scott Shackelford at AEON Development Group.

Here’s a great article from Mashable on how you can make your QR codes more appealing like this. Make sure you pay attention that your code is still readable.

blue qr image

Uses for QR Codes

The uses are only limited by your imagination, but let me give you some ideas:

QR Codes can be used:

  • On your business card (vCard);
  • Your brochures and other marketing materials;
  • The sides of trucks and trailers;
  • Product tags and packaging;
  • Convention and event nametags;
  • Restaurant menus;
  • Event ticket stubs;
  • Point-of-sale receipts, etc.

Reading QR Codes:

There are several apps for smartphones that can read QR Codes. Barcode Scanner for Android and QR Reader for iPhone and iPod Touch (with camera).
QR Codes could link to:

  • Installation instructions
  • Contact information
  • Sources for replacement parts and service
  • Map and directions to your business
  • Coupons and special offers
  • Free software downloads
  • Customer feedback forms

ZeroBlue offers two Bluetooth 2D scanners:

  1. Koamtac KCD 300
  2. Socket CHS 7X

Both scanners work with 1D barcodes, as well. The Socket scanner is also ruggedized; withstands multiple 5-foot drops to concrete. Dust, shock, and water-resistant.

If you’d like to implement QR code printing or scanning in your business contact us.

Good-Looking Progress Bars In Portals

Now the demo file is multi-platform.

Hopefully, I am not the only FileMaker developer who would like to see good-looking progress bars in portal rows. It is not the easiest task to achieve this, however. Most web developer friends wold say, they don’t understand the problem. They would even offer to make some javascript code to get the ball rolling. What they don’t know is that web viewers won’t display from a portal row, therefore you cannot display a web page in a portal. Some people make progress bars by using repetitions of the same field with conditional formatting. I don’t find those aesthetically pleasing. More often than not, when I need a trick, someone has already come up with it, however, this I couldn’t find anywhere. (If I missed something cool, let me know.)

So, one night I was thinking about how to make a good-looking progress bar in a portal. Since lately I’ve been poking around in the solution file for the 360 Works ScriptMaster plug-in, I turned it to see if anything pops out that can help me. Then I thought to myself, what if I had a nice progress bar generated by HTML code and I’d take a screenshot and dumped it into a container field.

This is not a perfect solution to the problem and some of you might say it’s not elegant. I think it does the job and the result is a good-looking progress bar that you can change with a drop-down menu. It requires the free ScriptMaster plug-in, which will be installed upon opening the file.

I’d like to thank Tim Cimbura for his “Awesome Progress Bar” example. Google it for more info. If you’d like to take this a step further, create your progress bar in Photoshop to match your DB style (or different colors for different percentages), export them as PNG24 then encode those as Base64 individually. Then replace the code in the web viewer.

If I have time, I’ll update the file.
Download the updated demo file

Instructions

The example file contains a “Projects” layout that has some related tasks. The layout also tab contains a tab control that’s hidden from the untrained eye. Don’t be afraid to play with the file, you can always download another copy.

One of the invisible tabs contains a web viewer that has HTML code in it that generates the progress bar. This part I borrowed from Tim Zimbura.

Follow the steps below to implement this in your own solution:

  1. Add two fields to the table you show the records from in your portal: a container field called “container” and a “percent” number field.
  2. Copy and paste the whole folder of scripts called “Copy This Folder To Your Solution” into your solution. Place a line in your open script to run the “. register functions” script.
  3. Place the container field in your portal. place the percent field in your area where you modify your selected records.
  4. Copy the HTML code from the Web Viewer in my solution and paste it into a text editor.
  5. Copy the tab control from the “Projects” layout and paste it onto your parent layout showing the portal.
  6. In the text editor replace the field in the HTML with your container field, then copy and paste the code into the web viewer you just placed on your layout.
  7. In the script called “. generate progress bar”, point the missing field to your container.
  8. Make the percent field trigger the “. generate progress bar” script OnModfy.
  9. Go back to browse mode and check it out.

Enjoy!


Navigating Hidden Tabs On A Layout Via Drop-Down Menu (with demo file)

FileMaker 8 gave us tab controls. Tabs can replace a set of layouts to save you time as a developer (eg. fewer layouts to maintain) and give your user a more streamlined solution. If you already use tabs, you may have layouts that look like the one below with lots of tabs or with multiple set s of tabs. That can get quite cumbersome to navigate or to even look at.

I designed the layout on the left over 4 years ago with the skill set I possessed and the capabilities FileMaker had at the time. You can clearly see we had a lot of tabs and several of them even have enclosing tabs.


If you are interested in designing your layout to look similar to this one without tabs (FOCUS Framework showed here courtesy of Vince Menanno) read on. This layout includes tabs, they are just not visible in browse mode or even to the untrained eye in layout mode.


When you add tabs to a layout, your layout looks like the one on the left. This—in its original form—is not a pretty sight. You can change the color for each tab but as time goes by you will have more and more tabs, and at some point you’ll run out of real estate. This post is about removing the clutter and navigating hidden tab controls via a drop-down menu.

There is a free demo file in this post (scroll down).. To demonstrate the technique, it has a “Dogs” layout that has a tab control with 3 tabs. The second tab encloses a tab control with 2 tabs. ALL of these tabs are hidden from the untrained eye. Navigation is achieved via a drop-down menu. The menu is populated by a value list that is generated by records in a navigation table. Implementing this technique in your own file requires that you copy a table from the demo file into your own solution. You can freely implement this technique, but please note the file is “as is”. In the future we might release updates to it. Don’t be afraid to play with the file, you can always download another copy.

About hidden tabs

A tab control is “invisible” ei. hidden, when all three conditions are met:

  1. Tab width is “Fixed Width of 0”;
  2. Tab has no line attributes;
  3. Tab has no fill attributes.

If you don’t know whether a layout has hidden tab controls you will want to treat your layout gently. The easiest way to make hidden tabs visible is by dragging your mouse diagonally on the layout holding the Command (Apple) or CTRL (Windows) key down. Once selected, you can go to Format/Tab Control to see the formatting box.

The idea

In the demo file the invisible tabs are controlled by a value list-driven menu on the layout. There are several steps involved (see below). In the solution we added tabs to the tab controls on the layout, then assigned them “object names”. The process is that once you come back to browse mode, your tabs are automatically added to the drop-down menu, sorted by order and enclosed tabs show up on the menu under their respective parent. This demo file is not for everyone. If you are not comfortable adding an extra table to your existing solution, this is not for you.

Watch it in action

Unfortunately, YouTube cut off the end of the video with the contact information, but if you are reading this post, you know how to contact me.

Follow the steps below to implement this in your own solution:

  1. Copy the “Navigation” table and paste it in you solution.
  2. Copy the “Menu” and “Layout_Number” fields form the “Dog” table and paste it in the table your layout gets its data from. Connect your table to the “Navigation” TO (Layout_Number = Layout_Number).
  3. Copy and paste the whole folder of scripts called “Copy This Folder To Your Solution” into your solution. Connect your table to “Navigation” (Layout_Number = Layout_Number).
  4. Create a value list. Use values from a field called Navigation::Tab and also from Navigation::Sort_by. Include only related values from your own table and sort by the second field.
  5. Place the “Menu” field on the layout you are working on. Assign the freshly created value list to your “menu” field. Assign the “Switch to Tab ( tab ; -table ; -default_tab) “script to the OnObjectSave trigger, pass the “menu” field as a parameter.
  6. Create your tabs (if you don’t have them). and give each tab a unique object name.
  7. Go to Layout Setup/Script Triggers and assign the “Create Tab Records” script to the “OnModeEnter” trigger (only for Browse Mode) and the “Switch to Tab ( tab ; -table ; -default_tab)”script to OnLayoutEnter and set all three parameters.
  8. Go to Browse Mode, your menu should work now.


iPad Quiz Results in a FileMaker Chart (with demo file)

All of you who have taken my iPad Quiz probably wondered where the results went. Well, I’ve been busy and most of you probably pre-ordered an iPad by now, but here are the results anyway. I am also including a demo FileMaker file to see how the results were charted. The data comes from the same source table, hence the anomalies on the charts.